Thursday 29 August 2024

Enhance Your Toyota GR86: Exploring the Benefits of the Carbon Fiber Front Lip

The Toyota GR86 has earned a reputation for its sporty handling and sleek design. For enthusiasts looking to elevate both the aesthetics and performance of their GR86 front lip is a popular upgrade. This article explores how a carbon fiber front lip enhances your GR86, along with the benefits of integrating other carbon fiber car parts into your vehicle.

Why Choose a Carbon Fiber Front Lip?

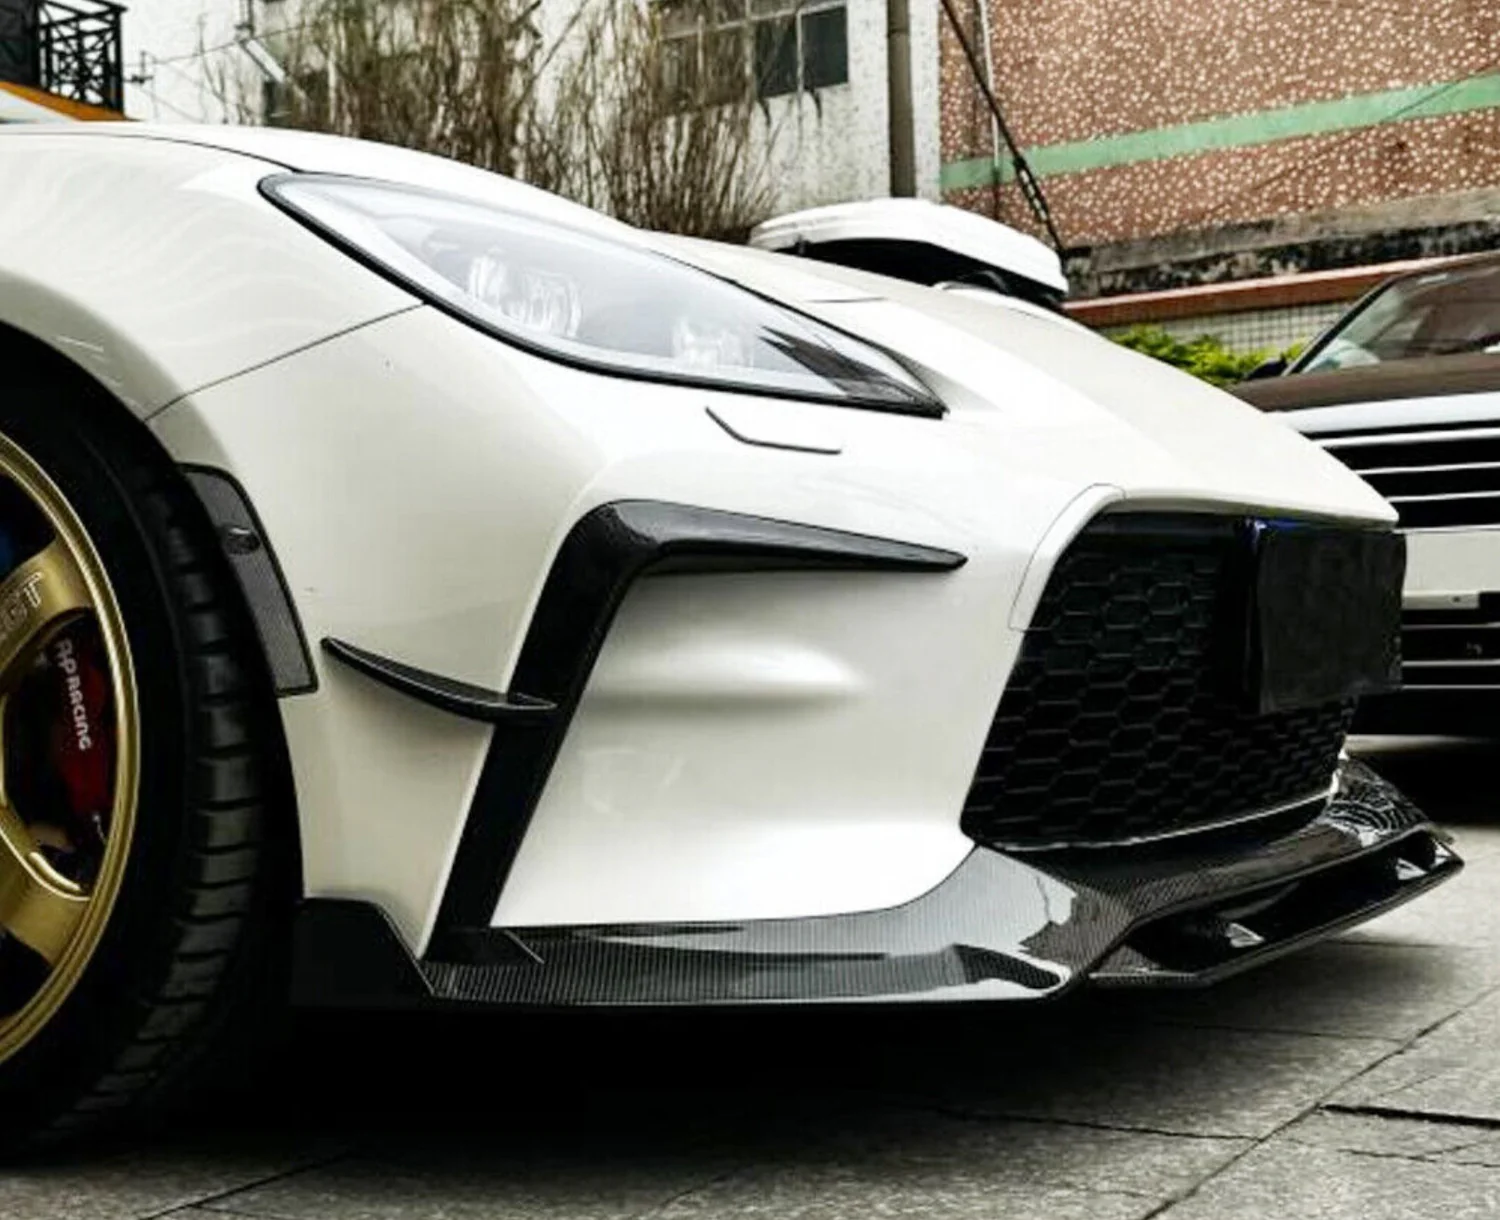
A carbon fiber front lip can significantly enhance your Toyota GR86. Here’s how:

  • Improved Aerodynamics: One of the primary benefits of a carbon fiber front lip is its impact on aerodynamics. The front lip helps to reduce air drag and increase downforce, improving stability at high speeds. This aerodynamic-enhancement is crucial for drivers who push their GR86 to its limits on track days or spirited drives.

  • Sleek, Sporty Appearance: The carbon fiber front lip adds a high-tech, aggressive look to your GR86. The weave pattern of carbon fiber gives a distinctive, premium appearance that complements the GR86’s sporty design. It’s a popular choice for those looking to make their vehicle stand out from the crowd.

  • Durability and Weight Reduction: Carbon fiber is known for its strength-to-weight ratio. A front lip made from this material is not only lightweight but also highly durable. It can withstand the rigors of everyday driving, including impacts from road debris, better than some traditional materials.

Choosing the Right Carbon Fiber Front Lip

When selecting a carbon fiber front lip for your Toyota GR86, consider these factors:

  • Fit and Compatibility: Ensure that the front lip is specifically designed for the Toyota GR86. Proper fitment is crucial for both performance and aesthetics. Parts that are not designed for your specific model can lead to poor performance and potential damage.

  • Quality of Carbon Fiber: Not all carbon fiber is created equal. Look for high-quality carbon fiber that offers a smooth finish and robust construction. Cheaper options may not provide the same level of durability or appearance.

  • Installation: Decide whether you will install the front lip yourself or seek professional help. While some carbon fiber front lips are designed for DIY installation, others may require professional fitting to ensure a perfect fit and finish.

Integrating Carbon Fiber Car Parts

In addition to the front lip, consider integrating other carbon fiber car parts into your Toyota GR86 to further enhance performance and aesthetics:

  • Side Skirts and Diffusers: Complement your front lip with carbon fiber side skirts and rear diffusers. These parts work together to improve aerodynamics and give your GR86 a cohesive, aggressive look.

  • Hood and Roof Panels: Upgrading to carbon fiber hood and roof panels can reduce weight and further improve the vehicle’s performance. These parts also contribute to a sleek, modern appearance.

Maintaining Your Carbon Fiber Parts

To keep your carbon fiber car parts looking their best, follow these maintenance tips:

  • Regular Cleaning: Use a mild soap and water solution to clean carbon fiber parts. Avoid abrasive cleaners or brushes that can scratch the surface.

  • Protection: Apply a protective coating designed for carbon fiber to safeguard against UV damage and oxidation. This will help maintain the finish and prolong the life of your parts.

Conclusion

Upgrading your Toyota GR86 with a carbon fiber front lip and other carbon fiber car parts can significantly enhance both the performance and appearance of your vehicle. The aerodynamic benefits, stylish look, and durability of carbon fiber make it a popular choice for enthusiasts seeking to elevate their driving experience. By carefully selecting high-quality parts and considering professional installation, you can enjoy the full advantages of these upgrades. Embrace the potential of carbon fiber to transform your GR86 into a standout vehicle that combines performance and style.

How to Troubleshoot Common Issues with Electric Shavers


Electric shavers have become essential tools in personal grooming, offering convenience and precision for a smooth shave. However, like any device, they can sometimes encounter issues that affect their performance. Whether you’re using a foil shaver, a Babyliss shaver, or another model, knowing how to troubleshoot common problems can help you maintain optimal performance and extend the life of your shaver. In this guide, we'll walk you through the steps to troubleshoot and resolve frequent issues with electric shavers.

1. Shaver Not Turning On

Possible Causes:

Battery Issues: The most common reason for an electric shaver not turning on is a depleted or faulty battery.

Power Supply Problems: If the shaver is corded, check the power cord and plug for any damage or loose connections.

Solutions:

Charge or Replace the Battery: For cordless models, ensure the shaver is fully charged. If the battery is old or defective, consider replacing it or contacting the manufacturer for a replacement.

Inspect the Power Cord: For corded models, check the cord for any visible damage and ensure it is properly connected to a power source.


2. Ineffective Shaving or Poor Performance

Possible Causes:

Dull Blades: Over time, the blades on your shaver can become dull, affecting their ability to cut effectively.

Clogged Foil or Blade: Hair and debris can accumulate, hindering the shaver’s performance.

Solutions:

Replace or Sharpen Blades: Check the manufacturer’s recommendations for blade replacement or sharpening. Many foil shavers, including those from Babyliss shavers, have replaceable blade systems that should be updated regularly.

Clean the Shaver: Regularly clean the foil and blades according to the manufacturer’s instructions. Most electric shavers come with a cleaning brush or a built-in cleaning system.

3. Skin Irritation or Razor Burn

Possible Causes:

Overuse or Incorrect Technique: Using the shaver too frequently or with improper technique can cause skin irritation.

Unclean Shaver: Bacteria and residue from the shaver can irritate the skin.

Solutions:

Adjust Your Technique: Use gentle, circular motions and avoid pressing too hard on the skin. Ensure you follow the manufacturer’s guidelines for proper usage.

Maintain Cleanliness: Clean the shaver after each use to remove any bacteria or residue. Consider using an antimicrobial cleaning solution to keep the shaver hygienic.

4. Battery Not Holding a Charge

Possible Causes:

Battery Age: Over time, rechargeable batteries can lose their ability to hold a charge.

Charging Port Issues: A malfunctioning charging port can prevent the battery from charging properly.

Solutions:

Replace the Battery: If the battery is no longer holding a charge, it may need to be replaced. Consult with the manufacturer or a professional repair service for replacement options.

Check the Charging Port: Ensure the charging port is free of debris and functions correctly. If the issue persists, you may need to have it repaired or replaced.

5. Shaver Producing Excessive Noise

Possible Causes:

Loose Parts: Over time, components in the shaver may become loose, causing unusual noises.

Blade Issues: Dull or damaged blades can produce extra noise during operation.

Solutions:

Inspect and Tighten Components: Check the shaver for any loose parts or screws and tighten them as needed. Refer to the user manual for guidance on disassembling and reassembling the shaver.

Replace Blades: If the blades are dull or damaged, replacing them can reduce noise and improve performance.

6. Charging Issues

Possible Causes:

Faulty Charger: A malfunctioning charger can prevent the shaver from charging properly.

Connection Problems: Loose or dirty connections between the charger and shaver can cause charging issues.

Solutions:

Test the Charger: Use a different charger compatible with your shaver to determine if the issue lies with the charger. If necessary, purchase a replacement charger from the manufacturer.

Clean Connections: Ensure that the charging port and connector are clean and free from debris. 

7. Shaver Not Providing a Close Shave

Possible Causes:

Blade Misalignment: Misaligned blades can affect the closeness of the shave.

Worn Foil: The foil on a foil shaver can wear out over time, reducing effectiveness.

Solutions:

Realign Blades: Ensure that the blades are properly aligned according to the manufacturer’s instructions. Adjust if necessary.

Replace the Foil: If the foil is worn or damaged, replacing it can restore the shaver’s performance. Many Babyliss shavers and other foil shavers offer replacement foils.

Conclusion

Troubleshooting common issues with electric shavers, whether you’re using a foil shaver, a Babyliss shaver, or another model, involves understanding the typical problems and knowing how to address them effectively. By following these troubleshooting steps, you can resolve issues related to battery performance, shaving effectiveness, and overall functionality. 


Social Media Success: How to Use Makeup Product Photography to Boost Your Brand

  In the digital age, social media has become an essential platform for brands, particularly in the beauty industry. With over 4.7 billion a...